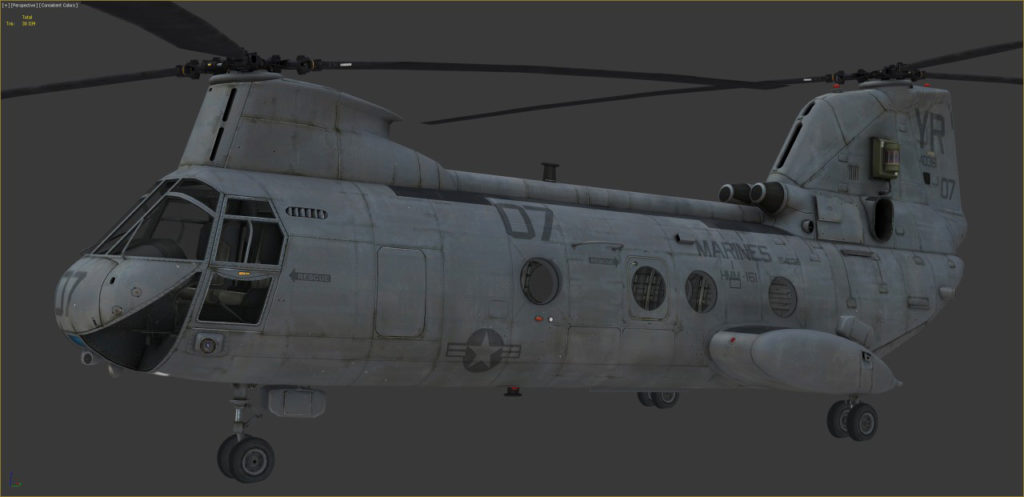
Old-style (But Not Useless) Texturing Workflow

Although PBR rendering is being actively introduced into the simulators market, an enormous part of the systems are still using classic visualization or transition concepts. Consequently, an ability to create quality diffusion textures still remains an essential skill for the artists working in this area.
You may get surprisingly high-quality models without creating high poly geometry and using only your favorite 3D modeling package and good old Photoshop.
So, our studio may recommend the following recipe of a good diffusion texture:
- Everything gets started with the proper UV mapping. Use automation tools very carefully. Don’t make texel size the same for all elements. Sometimes, a small part, such as a headlight or an outboard motor, can “make” the whole model. Choose “points of interest” on your model and give them some extra space there on your UV layout.
- Do not use significant pure color areas, even if you create a brand new plastic hair-dryer model – add nonuniformity into the color.
- Do not use too hard ambient occlusion, use multiply, and overlay layers combinations with various percentages to create soft and expressive shading.
- Despite the rule not to include any directional lighting into diffusion textures, we sometimes use top light or environment reflection to create our models. Bake such lighting effects without shadows and add them in minimal quantity.
- Mark the details with dark lines and strokes, as if you were using a real cavity map. It’s not so difficult to make by hand. Mud, dust, and age hardening appear at the parts’ joints, seams, and other anomalies – add them. To do this, you may use artistic paint-brushes or fragments of real photos.
- There is no darkness without light, and there is no light without darkness. Use a curvature map to make corners lighter and to add scratches and scuff marks. Illuminate cylinders and organic surfaces a little to give them more volume. If all this is made carefully, it will not conflict with any directional light in the final scene.
- Work on the texture with a white pencil and add specular reflection at all convexed and rough elements.
- The best diffusion texture is a photo. Use various elements taken from real photos. Photoshop has numerous tools to extract any directional lighting and naturally insert it into your texture.
- Evaluate your model from various distances. It would be disappointing to spend many hours working on small details and finally find out that your texture is losing them when you just remove it 10 meters farther from the observer.
- Test your texture at the target engine using various lighting. In fact, many old-style rendering disadvantages may be corrected with a good diffusion texture.
- Use post-processing in the form of control layers; add contrast to the final texture.
It’s easy to notice that all these tips are extremely simple. Making good models is so easy indeed 🙂


